This chapter of our documentation is still in beta. We welcome feedback, corrections,
and questions while we finalize the page in our 2024–2025 work cycle.
Introduction to Documentation Guidelines
Introduction
This chapter explains how to write and encode documentation for LEMDO. The intended
audience is writers of documentation (Technical Writers, Developers, and Project Leads).
These instructions presuppose that you are a LEMDO team member with access to the
LEMDO Microsoft Teams workspace (and the LEMDO Subversion repository https://hcmc.uvic.ca/svn/lemdo) and possess a certain knowledge of encoding, LEMDO’s repository structure, and our
existing documentation.
Table of Contents
Documentation Principles: Documents the key principles that we follow when writing documentation.
Encode Intended Audience for Documentation: Documents the different audiences that we write documentation for and explains how
to indicate that audience in our encoding.
Encode Sample XML: Introduces the way that we encode examples of encoding in our documentation.
Encode egXMLs: Provides our practice for encoding sample TEI encoding in our documentation.
Create Templates for Editors: Documents how we create template files that can be accessed in the LEMDO repository.
Documentation Principles
Avoid Duplication
Do not duplicate information across our documentation. Document and prescribe practices
in the files that will be the most useful to the greatest number of users.
Check all locations where we keep documentation to make sure that the documentation
has not already been written. Do a keyword search in all the locations. At the time
these Documentation Guidelines are being written (2020), we have documentation in
the repository (…/data/documentation) and in Microsoft Teams.
Decide where your file will fit into the rest of LEMDO’s documentation. Without this
information, developers will not be able to process your documentation file. Consider
whether the documentation you are writing should be a standalone section or if it
could be added to an existing section. Talk to a developer about your documentation
files if you think they should be in an entirely new section. See LEMDO’s Documentation Index for a bird’s-eye view of the documentation chapters and sections. See General Documentation Structure for information on how to add your new section to the Documentation Index.
Divide General from Specific
Do not overwhelm users with information they don’t need about highly specialized editorial
or encoding challenges. From the main documents, point to other documents with more
specific information, solutions to unusual problems, and special cases. Point back
to the general documentation from this more specialized documentation, in case users
needing more general information land in specialized documentation through a search.
The exception to the rule about general and specific documentation is documentation
for remediators. Remediation is a specialized activity that presupposes a good knowledge
of our editorial and encoding procedures; our remediators are generally not editors,
however, and tend to learn encoding by remediating. So our documentation for remediators
has to point back to the more general information. However, we do not want to point
from the general documentation to the remediation documentation, which regular users
of the LEMDO guidelines will not need.
For example, you will want to create one piece of documentation explaining how to
create a bibliography (for editors) and one explaining how to remediate a bibliography
(for remediator-encoders). You will want to link from the latter to the former, but
not from the former to the latter.
Validity of Example
All sample XML tagged with
<egXML>
needs to be clearly flagged as valid or invalid, using the
@valid attribute and the values of true or false. Create valid examples as much as possible so that editors and encoders can copy
the sample XML into their own files as a template. We check the validity of all examples
tagged with
<egXML>
and given the value true. Checking the validity of supposedly valid examples means that we are prompted to
update our examples if the schema changes. That means that valid examples must be
wrapped in their parent element to be valid and contain all of the child elements
required to complete the parent element. When this principle conflicts with the principle
of Economy of Example, use your judgement to decide whether validity or economy is most helpful to the editor
or encoder. (Note that LEMDO does not use the feasible value on the
@valid attribute, even though it is an allowed value in the tei-all schema. Our constrained
schema disallows feasible. See Encode egXMLs.)
Economy of Example
Remove any tags from sample XML that are not relevant to the example, with the caveat
that the sample XML should still aim to be valid as often as possible. If the example
becomes unnecessarily complex in the service of achieving validity, then consider
offering a bare-bones example and giving the
@valid attribute the value of false. If the value is false, we will be able to add a note or flag at rendering time noting that the example
is incomplete and will require additional elements to be complete and valid. When
this principle conflicts with the principle of Validity of Example, use your judgement to decide whether validity or economy is most helpful to the editor
or encoder.
Standalone Pages
Each page must stand alone, even though we have structured the documentation as a
book with chapters and sections. There is no guarantee that a user will have read
an earlier page, and the generous linking within our documentation means that a user
may have directed to a page from a variety of other pages. Furthermore, users may
stumble across a page via a search of either the site or of the internet. Landing
in the middle of a book is disorienting. Try to direct readers back to general pages.
If a page presupposes knowledge, be explicit that the instructions assume knowledge
of X, Y, and Z (and point to those pages or chapters).
Consistent Encoding Across Project
We use TEI-XML across the project so that documentation can be processed in the same
way as other born-digital files. This principle means that the most meta aspects of
our documentation need to be presented as images (for example, documentation on how
to encode examples in documentation, a problem which even the TEI Guidelines have not resolved well).
Documentation and the ODD File
Introduction
This file explains the relationship between documentation files and the project’s
ODD file. It provides a quick and general overview of the files involved in the corresponding
processes, and then describes the processes in general, without too much attention
to the technical details.
Relevant Code Files
Below is a list of code files stored in lemdo/code/site/xsl/documentation, responsible for generating and processing documentation files, along with their
role in the process.
documentation_inclusion_master.xsl: Adds the content from the individual documentation files rooted on divs into the
ODD file.
documentation_to_documentation_chapters_master.xsl: Creates the chapter as determined by the corresponding
<div>
element and the value of its
@xml:id attribute in the body of ODD. The chapter contains sections.
documentation_to_documentation_sections_master.xsl: Creates the sections by adding them via a process of ?lemdo-include that specifies the names of the individual files (stored in data/documentation).
documentation_to_elements_master.xsl: Extracts the elements (
<div>
[
@type=refdoc]) in lemdo.lite.odd into their separate files. In the odd file we add element abstracts to the elementSpec
as needed. These are added in
<remark>
elements, unless we want to replace the TEI desc, then we add
<desc>
elements with
@mode attribute whose value is replace.
lemdo_extract_egXMLs_master.xsl
lemdo_extract_rules.xsl: Extracts the rules from the schema that is written and developed in the ODD file
Processes
We write our documentation in files that are rooted on
<div>
elements and we store them in the lemdo/data/documentation folder. These files are then included in the ODD file via processing instructions
and a series of XSL transformations. Every chapter is a
<div>
in the body of the ODD file, and every
<div>
includes a series of processing instructions that are later processed into the sections
(pages) of a certain chapter. The sections are the files from data/documentation. The chapters are generated programmatically, as instructed per the ODD file. This
process happens through the XSL files as described above.
The documentation_to_documentation_chapters_master.xsl file is also responsible for creating the documentation index, from the chapter
<div>
s as they are laid out in the lemdo.lite.odd stage of the documentation creation process. While the chapter titles (Chapter 1. Quickstart Guidelines, etc.) are determined in the odd file, the section headers are determined in the
<head>
child element of the root
<div>
element in the corresponding documentation file.
Please see for detailed guidelines. We write the documentation with a root
<div>
element so that we can append the file content to the LEMDO ODD file as we generate it. From the ODD file we then grab corresponding
<div>
s and create the proper structure for them, adding header and body elements. This
process begins with the documentation_inclusion_master.xsl, which includes the
<div>
elements in the LEMDO ODD file, as instructed by a series of processing instructions.
The documentation_to_documentation_chapters_master.xsl and documentation_to_documentation_sections_master.xsl files process the documentation
<div>
elements from the LEMDO TEI Lite ODD file and make them into their own standalone
files, in XML as well as HTML.
All of the above happens automatically as part of the build process. However, you
may want to test your documentation locally, in XML or HTML. To build XML files, go
to code/build_documentation_master.xsl, and press the play button. The files are outputted in lemdo/chapters_out and lemdo/sections_out. To locally build your documentation files into html files, open Terminal and type
the following command: ant createDocumentation. You can find more on local builds in Running Builds.
Adding Element Notes and Replacing TEI Abstracts
In LEMDO, element documentation is generated directly as imported from the TEI P5 Guidelines. Given the nature of the project and the specialized uses for TEI elements, LEMDO
adds notes and modifies TEI abstracts where necessary. This process is accomplished
in the
<elementSpec>
elements of the corresponding element in the ODD file. To add a note to the existing
element structure and descriptions, follow these steps:
Find the element you want to change by searching for it using command + F (for Mac users) or Ctrl + F (For Windows and Linux users)
Add a
@mode attribute with the value change
Add the element you want to replace
To replace the
<gloss>
or
<desc>
elements and their content, add the element you want to replace and give it a
@mode attribute and the value change
Write your content between the opening and closing tags
Note that the
<gloss>
and
<desc>
elements and their original TEI content are not present in the ODD file, they are
automatically imported from the TEI guidelines at processing time. If you would like
to add a note to the existing TEI descriptions, follow these steps:
In
<elementSpec>
, add a
<remarks>
element with a
@mode attribute and a value add
Write your note in
<p>
elements inside of
<remarks>
Your note will appear in the table of specs on the element’s page on the LEMDO site,
with the label Note.
General Documentation Structure
The documentation folder in the LEMDO repository consists of discrete files, each of which has a file
name beginning with learn_. Each file is meant to function as a discrete section of documentation, with links
to other sections or subsections (i.e.,
<div>
elements within those files) as necessary. Each file is rooted on a
<div>
element and ought to contain an independently understandable section of a chapter
(as much as anything is independently understandable). (See Structure of a Single Documentation File for more information on how single files are structured.
Note that we wrote some of these now-discrete files as much longer pieces of writing
and have had to do the work of separating them and making them function independently.
We have accounted for three factors in the division of documentation into discrete
files:
The need of users for short Web pages that give them exactly what they need to solve
a problem or to learn how to do something.
The need of users to read information in a particular order (i.e., if it is essential
that users decide between two options, we keep the options in one file or make it
clear at the top of both files that users also need to read the other file before
making a decision). If it is essential that users understand a particular concept
before undertaking a process, then we keep the concept and the process in the same
file, or make it clear at the top of the second file that the user needs to understand
the concept in the first file before proceeding.
The overall length of the piece. Long pieces require a lot of nested
<div>
elements. We try to avoid complex nesting in documentation because it produces long
@xml:id values on
<div>
elements and implies hierarchies and dependencies that may not be necessary or true.
We process our documentation at rendering time into chapters. Each chapter groups
information for a particular user group or addresses a particular procedure or problem.
As of March 2026, the chapters are:
Chapter 1. Quickstart Guidelines
Chapter 2. Getting Started with LEMDO
Chapter 3. LEMDO’s Taxonomies
Chapter 4. Entities and Databases
Chapter 5. Making Links
Chapter 6. Style Guidelines
Chapter 7. General Encoding Guidelines
Chapter 8. Validation and Diagnostics
Chapter 9. Bibliography and Citation Guidelines
Chapter 10. Quotations
Chapter 11. Facsimiles
Chapter 12. Semi-Diplomatic Transcriptions
Chapter 13. Semi-Diplomatic Transcriptions: Features Unique to Print Playbooks
Chapter 14. Semi-Diplomatic Transcriptions: Features Unique to Manuscript Playbooks
Chapter 15. Collation
Chapter 16. Modernized Texts
Chapter 17. Annotations
Chapter 18. Critical Paratexts
Chapter 19. Media
Chapter 20. Metadata
Chapter 21. Editions and Licensing
Chapter 22. Anthology Customization
Chapter 23. Anthology Release
Chapter 24. Programming
Chapter 25. Documentation Guidelines
Chapter 26. Conversions and Remediations
Appendix 1. Elements
Appendix 2. Attributes
Appendix 3: Supplementary Texts
Appendix 5. Legacy Markup
To group sections under the right chapter heading, we go to the ODD file. The ODD
file (lemdo.odd) contains a list of chapters, each chapter having its own
@xml:id defined in the ODD file itself. We list the files in the order that we think will
make the most sense to someone who arrives at the documentation via the Documentation Index. You will need to ask a Developer either to give you permission to edit the ODD file
or to add the new section for you.
Chapter numbers are defined only in the ODD file. Chapter numbers are not part of
the XML files that constitute chapter introductions and sections, which makes it simple
to move sections and reorder chapters if it seems beneficial to do so.
Documentation Chapter Introductions
Each chapter begins with a short introduction. The introduction is a discrete XML
file. It is meant to say something about the learning outcomes of the chapter. The
introduction ends with a table of contents linking to all the other files in the chapter.
If the chapter is written for a particular type of LEMDO user, the introduction will
need to indicate the intended audience (anthology leads, editors, encoders, remediators,
and/or developers). If the chapter presupposes certain knowledge or experience, the
introduction will also need make suggestions about what the user should already know
(with links to relevant chapters and sections as necessary), and/or refer the user
to the anthology leads or to a particular team for further direction.
The recommended structure for each chapter introduction is as follows:
Audience (if applicable; put this section in a
<p>
element without a parent
<div>
at the beginning of the file)
Prior Reading (if applicable)
Learning Outcomes
Contents
Start the Learning Outcomes section with a brief statement of the content of the chapter. Introduce the list
of learning outcomes with the phrase “By the time you have worked through every section
of this chapter, you will,” followed by a colon. Begin each list item with a verb.
Encode the table of contents as a
<table>
with two cells in each row. Give the columns the labels “Section” and “Description.”
Start the description with a verb.
Example
<div xml:id="learn_gettingStartedIntro_prior"> <head>Prior Reading</head> <p>This chapter presupposes that you have read the Quickstart(s) appropriate to your
role with LEMDO and that you either already know TEI-XML or have read <ptr target="doc:learn_quickStartTEI"/>.</p> </div><div xml:id="learn_gettingStartedIntro_learningOutcomes"> <head>Learning Outcomes</head> <p>This chapter gives you all the information you need to get started on your edition.
By the time you have worked through every section of this chapter, you will:
<list rend="bulleted"> <item>have affiliate status at UVic</item> <item>have a NetLink Id and password that gives you access to your files in the LEMDO repository</item> <!-- list continues --> </list> </p> </div><div xml:id="learn_gettingStartedIntro_TOC"> <head>Contents</head> <table> <row role="label"> <cell>Section</cell> <cell>Description</cell> </row> <row> <cell> <ptr target="doc:learn_getNetlink"/> </cell> <cell>Learn how to obtain affiliate status at UVic and set up a NetLink ID</cell> </row> <row> <cell> <ptr target="doc:learn_technicalRequirements"/> </cell> <cell>Learn what you need to have on your computer in order to work in the LEMDO
repository</cell> </row> <!-- rows continue --> </table> </div>
Documentation Style Guidelines
Writing
Consult this style guide for rules specific to documentation, otherwise, follow the
LEMDO Style Guidelines.
Voice and Pronouns
Keep voice, diction, pronouns, and other elements of language consistent across the
documentation. Always write in the active voice.
Use imperative second-person verbs at the beginning of headings whenever possible
(e.g. Create a New File).
Write documentation in first-person plural (we, our) to describe what we did in a particular case or what we do on the project in general;
the verb tense can be past or present depending on what we are describing.
Use second person (you) and imperative verbs when giving instructions to contributors and team members.
For third-person pronouns, do not use gendered pronouns unless you are referring to
a specific person and you know the person’s preferred pronouns. Otherwise, use the
gender-neutral singular pronoun they or phrase the entire sentence in the plural. Do not use he/she or s/he, which, in addition to being awkward, reinforce an outdated binary notion of gender.
Standard Diction for Headings
Use LEMDO’s standard diction to help readers understand the purpose of each section
of a documentation file. Users will quickly begin to understand how the documentation
is organized if we use these terms consistently. If all a user needs is a refresher
on the steps, they will know to look for the section with the term Step-by-Step. These are the terms we use:
Rationale sections explain why we follow the encoding practice being described in a particular
documentation file.
Principles sections outline the project principles that we follow when developing encoding practices.
Principles give us a set of rules by which to make encoding decisions in cases where
we cannot outline every possible use case or example.
Practice sections explain specific encoding practices and often include both prose and lists.
Workflow sections are usually lists and outline the steps required to complete a particular
encoding project and the order in which users typically undertake those tasks.
Step-by-Step sections are numbered lists designed to be skimmed quickly with short instructions
on how to complete a certain encoding task.
At a Glance sections often include tables with just the information the user is most likely to
need, such a quick visual of the pattern for making xml:ids.
Examples sections include examples of the encoding described in the documentation file.
Special Cases sections include examples that are atypical but still appear in encoding and must
be taken into account.
Tips sections include non-essential but helpful information, such as strategies that allow
users to work more efficiently.
Optional sections include encoding practices that are not relevant to some users or in specific
scenarios.
Rendering Note sections give information on how the encoded material will look on the LEMDO site
or how the encoding practice will affect rendering.
Disambiguation sections distinguish between similar things that users may assume are the same. They
usually include links to other documentation pages with information on the thing being
disambiguated.
Prior Reading sections include links to documentation pages that should be read before reading
the current page.
Further Reading sections include links to documentation pages that should be read after reading the
current page.
Use these terms in the
<head>
elements of documentation
<div>
elements and wherever it seems appropriate to repeat the terms in the running text.
If you need to write two sets of instructions of varying complexity, use the headings
Step-by-Step: Basic and Step-by-Step: Advanced. If you are only writing one set of instructions, use the heading Step-by-Step.
Special Case: Category References
Chapters that deal with a specific type of document will have a file that discusses
the
<catRef>
elements (category references) that are required for the document. Give the file
a title as follows: Encode File Categories in Topic (where Topic = the standard term that we are using in file titles throughout that chapter). Examples:
Encode File Categories in Semi-Diplomatic Transcriptions.
Diction in Running Text
Use plain language in your writing. Link to GLOSS1 if users require knowledge of technical terms and provide an explanation of concepts
that require specialist knowledge to understand your documentation.
Consider your audience and try to judge their familiarity with technical terms. On
one hand, you may use editorial terminology in the editorial guidelines because the
audience for that documentation are editors who will be comfortable with it. On the
other hand, do not use programming jargon in an encoding Quickstart guide unless you
provide explanations that are accessible to the audience of beginner encoders.
Modal verbs have particular meanings in the world of documentation. RFC 2119 (1997) sets out rules for the use of must, must not, required, shall, shall not, should, should not, recommended, may, and optional in documentation. The TEI Guidelines, which we quote from and link to in our guidelines, use a subset of these modal verbs.
RFC 2119, point 6 argues against the use of imperatives. However, we are writing documentation primarily
for editors, encoders, and LEMDO team members, most of whom need clear, simple instructions.
We tend to write our documentation in the imperative second-person, mainly to avoid
repeating the implied modal verb must. If something is truly optional or recommended, say so.
Consider audience when writing headings in documentation files. Editors are more likely
to go to documentation looking for the solution to an editorial problem, not looking
for a description of an encoding protocol. Write headings like Encode Element Names instead of headings like Use
<gi>
. Remember that the text nodes of
<head>
elements will be generated into a table of contents later, and write headings that
will direct readers to the solution they need.
Use consistent language across the documentation. Occasionally we will recommend wording
for phrases or sentences that will be used often across our documentation.
We anticipate that readers will go to certain pages looking for information that is
actually on another page. You may also want to direct a reader to a more in-depth
explanation of a concept. Always link to the page that you mention. Choose a phrase
from the list below to recommend further reading to users:
<p>If you are looking for information on encoding foreign languages, go to <ptr target="doc:learn_encodeForeignLanguages"/>.</p>
<p>See also <ptr target="doc:learn_encodeForeignLanguages"/>.</p>
Be clear when you are talking about specific elements, attributes, and values. Note
that when you are encoding elements, attributes, and values, you will wrap them in
the elements
<gi>
,
<att>
, and
<val>
, but you also want to add clarifying words (see Encode Sample XML for encoding instructions):
Add the word element after the name of the element so it is clear that you are referring to the element.
Example:
“LEMDO uses the
<title>
element to tag the titles of written works”
Add the word attribute after the @name of the attribute. Example:
“Add a
@ref attribute to the
<name>
element.”
Add the word value before or after the name of the value. Examples:
“Give the
@corresp attribute the value of the xml:id in our shared bibliography.”
“If the stage direction describes an action, add the action value to the
@type attribute on the
<stage>
element.”
Do not use the phrase as such in documentation.
Spelling and Terminology
Write our shared bibliography when referring to BIBL1_A-BIBL1_Z in running prose, but sitewide bibliography in
<table>
elements.
Write Quickstart (e.g., Quickstart guide), not Quick start, QuickStart, or Quick-start.
Write ODD file in full capital letters, but write .odd when referring to the file extension.
Write Web page with Web capitalized and page not capitalized. Write Web site the same way.
Write website when you are referring to the final output that has a URL.
Write file name, not filename.
Write checkout, not check out when using the noun form.
Write screenshot, not screen shot, or screen-shot.
Write hash character, not hashtag, when referring to the following character: #.
When using born digital as a phrasal adjective (e.g., in the phrase born-digital text), write born-digital text, not born digital text.
Write work session as two words, not as a single word.
Write tagset, not tag set.
Write workflow, not work flow.
Write sitewide, not site-wide.
When referring to hungwords, write turnover, not turn-over. Also write turnunder, not turn-under.
Write forme work, not formework.
Write markup, not mark up or mark-up when you are referring to markup as a noun. Reserve mark up for the action of adding markup.
Write A.S.Sp. not A.S.SP when referring to our system of canonical references.
Write multivolume, not multi-volume.
Write shelfmark, not shelf-mark.
Write semi-diplomatic transcription, not semi-diplomatic text.
In titles and headings, capitalize both elements in hyphenated words, unless the first
element cannot stand alone as a word (e.g., anti-). For example, write Previously-Encoded and Anti-climactic, not Previously-encoded and Anti-Climactic. The exception is Semi-Diplomatic, in which both elements should be hyphenated.
Write roman, not Roman when discussing roman type.
Write LEMDO team (lowercase “t”) in running prose, but LEMDO Team (capitalized “T”) in
<respStmt>
elements.
Write back-end as the adjective in back-end server.Backend is the noun.
Write in addition rather than additionally.Additionally should only be used to modify verbs.
Write
“About” page rather than
“about” page when referring to anthology About pages. Wrap the work About in the
<soCalled>
element.
Punctuation
Avoid semicolons in documentation.
Do not use two hyphens or two en dashes in place of an em dash ( — ) in documentation.
You can insert an em dash using LEMDO’s list of special characters. See Practice: Bring Up a List of Special Characters.
Use a period at the end of each item in a list unless every item in the list is a
link with no other text.
Capitalization
Use lowercase for roles such as anthology lead and editor except in
<respStmt>
elements or credit pages.
Write xml:id in lowercase, not in partial or full capital letters (i.e. not XML:id or XML:ID), but write XML in capital letters when referring to the encoding language.
Write ID (e.g., NetLink ID), not id or Id, when not referring to xml:id.
Write Oxygen, not oXygen when referring to the encoding software we use (the company that makes Oxygen uses
both spellings).
Write TEI P5 without a hyphen.
Write affiliate identity, not Affiliate Identity.
Capitalize Schematron.
Capitalize Subversion and SVN.
Capitalize Terminal.
Capitalize Quickstart.
Write regex in lowercase.
Write NetLink, not Netlink or netlink.
Write drop-down, not dropdown or drop down when referring to drop-down menus.
Application Instructions
Use a Unicode arrow (U+2192) from the character map (i.e., →) to illustrate how to
find things in the menus of computer applications (e.g., Word, Teams, Oxygen).
Example showing a Unicode arrow used to give instructions:
Click Project → Open Project → lemdo-all.xpr.
Organization
Plan out the structure of your documentation before writing and encoding it. Consider
the users of the documentation and what they will expect from it. Encoding documentation
also becomes easier if you have a structure in mind beforehand.
Use point-first writing at the sentence, paragraph, and page level. Briefly outline
what you will be talking about at the beginning so users can quickly decide whether
it is relevant to them or not.
Order the options from most likely/advisable to least likely/advisable when we have
several possible encoding scenarios and solutions. Some scenarios are ubiquitous across
early modern drama, but given the type of material we edit and encode at LEMDO, others
are infrequent. However, we still have to imagine an encoding solution for the infrequent
scenarios.
Guide the encoder or editor by putting the most common scenario first. For example,
LEMDO uses several different elements to tag quoted and highlighted text. The element
with the least-specific use,
<q>
, is at the bottom of the list in the documentation for quotation elements because
we only want users to choose that element after they have tried all of the more specific
elements. The element that users will most likely need,
<quote>
, is at the top of the list.
Use
<div>
,
<head>
, and
<list>
elements whenever possible to make documentation easier to read and scan. However,
do not use
<list>
unless the material really is a list. Break up long blocks of text whenever possible.
Cite the TEI Guidelines
Name and link directly to relevant sections of TEI P5. Simply citing the TEI Guidelines with parenthetical references and links to our shared bibliography is not specific
enough for our purposes.
Note that anything tagged with
<gi>
will be automatically processed into a link to the relevant LEMDO element specification,
which in turn links to the element specification in the TEI Guidelines.
Treat the TEI Guidelines as a monograph and make a direct link to them. Encode TEI Guidelines with the
<title>
element, the
@level attribute and the value m.
Treat chapters of the TEI Guidelines as articles and make direct links to them. Encode the names chapters with the
<title>
element, the
@level attribute and the value a:
<p> <!-- ... --> See also <title level="a">Chapter 16: Linking, Segmentation, and Alignment</title> in the <title level="m">TEI Guidelines</title>. <!-- ... --></p>
Create and Name Documentation Files
The process for creating documentation files and commiting them to the LEMDO repository
differs from the process for creating and committing other types of files. This section
explains how to name, create, and commit documentation files.
Name Documentation Files
Name documentation files according to established LEMDO conventions. Come up with
a name that is descriptive but keep it as short as possible. Begin every documentation
file that you create with lemdo followed by an underscore.
Use camelCase for file names with more than one word following the underscore. Write
the descriptive part of the file name (e.g. encodingQuotations) in camelCase without underscores, even if it is more than one word. Never put spaces
in file names. If the name of your document contains an acronym (e.g., OED, TEI),
keep the acronym in full capital letters in the file name.
Examples:
learn_encodeQuotations.xml
learn_remediateOED.xml
Special Case: Name Category Files
We follow a structured filenaming protocol to avoid ambiguities and redundancies in
filenames. If you are making a new file, name the file as follows: learn_topicCatRef
(where topic = the standard term that we are using in filenames for the matter discussed in the
chapter).
Create an XML File and Commit it to the Repository
Move any documentation that you write in Teams into an XML file and encode it so it
can appear on the site. This section explains how to add your documentation to an
XML file, commit the file to the repository, and ensure that a developer publishes
your documentation on the LEMDO site.
Commit your encoded documentation files to the repository once they are complete and
valid; otherwise, the files will exist only on your local computer. Committing documentation
files to the repository is the first step to getting them to appear on the site. This
process requires two steps:
adding the file to the repository (svn add)
committing this change (svn commit)
LEMDO’s repository includes a ../data/documentation/ folder containing all of our documentation files. Commit your documentation files
to this folder. The organization of these files is done in a separate file, lemdo.odd,
so you do not need to worry about where to place your file within the ../data/documentation/ folder. See also Add, Reorder, and Rename Documentation: The ODD File.
Whether you are creating a new file, using an existing file as a template and replacing
the existing content with new content, or adding new content to an existing file,
the first few steps are the same. Follow these four steps to create an XML file:
If you wrote the documentation in another platform (i.e., Microsoft Teams), make a
note at the top of the shared document that the content therein is no longer the most
up-to-date version. Make a link from the Teams document to the LEMDO page once the
encoded documentation is visible on the site.
Ensure that you have the LEMDO repository checked out to your local computer and updated
(svn up).
Open Oxygen.
Ensure that you have lemdo-all.xpr open. If not, click Project → Open Project → lemdo-all.xpr.
After completing these steps, decide whether you want to create a new file or add
to an existing one and follow the corresponding instructions below.
Create a New File
Choose between creating a file from scratch or using an existing file as a template.
Both processes are explained in this section.
Create a File from Scratch
Click File → New → XML Document → Create.
Click File → Save as. Give the document a name and save it in the documentation folder in your local copy of the repository. See also Name Documentation Files.
Add a
<div>
element as your root element and add an
@xmlns attribute to it with the value http://www.tei-c.org/ns/1.0. Give the root
<div>
element an xml:id identical to the name of the file. See also Divisions.
Add your file to the repository (svn add) and commit your changes (svn commit).
Add a
@resp attribute to the root
<div>
element of the file. The value of the
@resp attribute is the role-specific xml:id of the technical writer and encoder. See also
Give Credit for Documentation Files.
Choose a file from LEMDO’s documentation folder and open it. Click File → Save as and save the file with a new name in the
documentation folder in your local copy of the repository. See also Name Documentation Files.
Change the xml:id of the root
<div>
element to match the name of the new file. See also Structure Documentation Files.
Add your file to the repository (svn add) and commit your changes (svn commit).
Change the values of the
@resp attribute on the root
<div>
element of the file, if necessary. The value of the
@resp attribute is the role-specific xml:id of the technical writer and encoder. See also
Give Credit for Documentation Files.
Change the content of the topmost
<head>
element to match the title of your document.
Sometimes the addition of material warrants a change to the xml:id and filename. However,
do not change the xml:id and filename of an existing file without a good reason. If
you do change the xml:id and filename, be aware that:
Add, Reorder, and Rename Documentation: The ODD File
Unlike other XML files, documentation files are not automatically published on the
site when you commit them. A developer has to write processing instructions in the
ODD file (lemdo.odd) to include the documentation file in the build process. These
processing instructions direct the ODD file to retrieve the documentation files and
publish them on the site, organized into chapters and sections within chapters.
Ensure that the ODD file is updated in the following circumstances:
if you rename a file (i.e., give it a new xml:id)
if you add a new documentation file
if you split a documentation file into multiple shorter files, each with a new xml:id
Note that any changes of filename must be accompanied by a change of the value of
the
@xml:id attribute. The value and the filename must be identical. Note also that any links
to the file from other files in the documentation will have to be updated. In other
words, changes in filenames and xml:ids need to be carefully planned and executed.
The ODD file drives the entire project. If you have not been given explicit permission
by the lead developer (Martin Holmes) to edit the ODD file, do not attempt to edit
the ODD file. Instead, delegate the task to a developer or to the project director
(Janelle Jenstad).
Delegate ODD Updates
Make a task in Teams in Developers’ Tasks asking someone to list your new documentation file in the ODD file. Assign the task
to Janelle or to any one of the Developers. On the task, provide the following three
pieces of information:
the name of the file, i.e.,
the name of the new file
the new name if you have renamed a file, and its old name as well
the new names if you have split an existing file into multiple files (and indicate
if you are keeping the existing (and now shorter) file or deleting it
the chapter to which the new documentation file belongs
where in the list of files in that chapter the new file belongs (before which file?
after which file?)
Update ODD Yourself
If you have permission to edit the ODD file, you may make the appropriate changes
of filename and/or reorder files in a chapter.
Encode Documentation Files
This section explains in detail how to encode LEMDO documentation files.
Tag the titles of pieces of LEMDO documentation with the
<title>
element, the
@level attribute, and the value a if you mention them in the documentation you are writing:
<p> <!-- ... --> See <title level="a">Quickstart for Remediators</title> for an overview of the types of texts we remediate. <!-- ... --></p>
Use all of the quotation elements available when tagging documentation files. Do not
replace all quotation marks with
<q>
, replace them with the appropriate quotation tag. See also Encoding Quotations, Terms, Expressions, and Glosses.
Documentation files do not contain a
<teiHeader>
and thus cannot have the
<respStmt>
elements that are required in all other files. Instead, the
<respStmt>
elements for writers and encoders of documentation are captured in the ODD file.
In the documentation files, which are rooted on the
<div>
element, we point to the
<respStmt>
elements in the ODD file.
Add
@resp attributes to this root
<div>
element. Use the or: pointer to point to the ODD file. The rest of the value is the
@xml:id for the specific person and role defined in the ODD file.
Examples of
<respStmt>
elements in the ODD file for the two roles that one person can play with respect
to documentation:
Example of a documentation
<div>
element with the value of a
@resp attribute pointing to the
<respStmt>
element in the ODD file:
<div resp="or:odd_VATC1_wtm"/>
These
@resp attributes can be added to the root
<div>
element and/or to any child
<div>
elements. You may choose to give credit at the level of child
<div>
elements if you want to highly granular credit for particular parts of a single documentation
file. Ideally, documentation is collaboratively written and the voices in any one
document should sound alike after iterative revisions by various team members. In
this case, it is best to capture all the contributors and their respective roles on
the root
<div>
element.
Add as many values as are required to capture all the roles played by various people
in the writing and encoding of a documentation file. The following captures the fact
that both Nicole Vatcher and Janelle Jenstad wrote and encoded the documentation file
in question:
Generally, we give credit only for two activities:
writing technical material (odd_ABCD1_wtm)
encoding technical material (odd_ABCD1_mrk)
Ask a Developer to create a new
<respStmt>
element and xml:id in the ODD file for new team members who write documentation.
Structure of a Single Documentation File
The root element of all documentation files is a
<div>
element with an
@xmlns attribute and the value http://www.tei-c.org/ns/1.0. Make the xml:id of the root
<div>
element identical to the name of the file.
XML files are primarily made up of nested
<div>
elements that allow us to indicate the hierarchical structure of the documentation
file and add descriptive navigational
<head>
elements to each
<div>
element.
Before you encode a file, establish the structure of the file by doing a document
analysis. When we write documentation in Teams, we usually use Styles to indicate
the levels of headers and the subordination of sections in the document hierarchy.
When we write documentation directly in an XML file, we tend to have the Outline View open and the filter set to show
<div>
elements so that we can see our document hierarchy at a glance.
The complexity of the structure of your file increases with the length of the file.
Consider whether your documentation should be a single file or several files. Separate
files are each listed in the ODD file, where we can order pieces however we like and
effectively chain them back together. We can also make links between files and between
<div>
elements within files.
LEMDO uses four main elements to organize content within documentation files:
<div>
(always with an
@xml:id attribute and a child
<head>
element)
<p>
<list>
<table>
These elements are not used exclusively in documentation files, but this section explains
how to use them to encode documentation.
Divisions
Divisions are the highest-level structural unit of documentation files. Each documentation
file is rooted on the
<div>
element. The root
<div>
element has one or more child
<div>
elements structuring the content of the documentation file.
<div>
elements can be nested to capture the hierarchical and subordinate sections within
a document.
XML is hierarchical and works by nesting content in a series of containers. For our
purposes, those containers are
<div>
elements. You need to know how to properly nest
<div>
elements in order to structure the content in your documentation correctly. It is
a good idea to plot the structure of your document prior to encoding it because rearranging
<div>
and
<head>
elements can be difficult.
Nest all other
<div>
elements in the documentation file within the root
<div>
element.
Create IDs for Document Divisions
Each
<div>
element must have an
@xml:id attribute with a value based on the position of the division in the hierarchy. Make
the xml:id of each
<div>
element (besides the root
<div>
element) the xml:id of the
<div>
element within which it is nested, plus a word or phrase (usually the heading of
the section) that makes it unique to that file. We use these xml:ids across the rest
of the documentation to generate document pointers and HTML links. The URLs of these
links will become very long if the division is nested far into the document hierarchy,
because every nested
<div>
element must have an xml:id that includes the xml:ids of all the parent
<div>
elements. This system quickly becomes unwieldy if xml:ids are not constructed economically.
Follow these principles to keep xml:ids short:
Think carefully about nesting
<div>
elements within
<div>
elements. Do you really need deeply nested divisions? Is the content actually a set
of paragraphs or a list? One advantage of creating a new
<div>
is that we can link to it from elsewhere, but think about whether we really need
to link to the very specific information that would be contained within a deeply nested
<div>
or if users might more profitably be pointed to a higher level in the hierarchy.
Be economical in the wording of the xml:id. Say perf rather than performance,ed rather than editing,eg rather than example,encode rather than encoding, and so on.
The final part of the xml:id on a
<div>
needs to be similar to the text node of the
<head>
element but does not have to replicate it. If possible, choose a single representative
word from the heading.
In this fictional example showing three nested
<div>
elements, the xml:id of the root
<div>
element is learn_encodeTerm. The xml:id of the file is the first part of the xml:id of each
<div>
element within that file. Each subsequent nested div inherits the full xml:id of
its parent
<div>
element and adds to the xml:id of its parent an underscore and a brief phrase.
learn_encodeTerm is the xml:id of the root
<div>
element, so the xml:ids of all of its child
<div>
elements in the file must contain that phrase. The xml:id of the root
<div>
element has the word Term in it because it reflects the content of the file (which is also captured in the
heading in the
<head>
element associated with this
<div>
element). The first
<div>
element is the largest container that holds the other two
<div>
elements, and the second
<div>
element contains the third
<div>
element.
Headings
Every
<div>
must have a heading, tagged with the
<head>
element. Add an appropriate heading for that section of the document in the text
node of the
<head>
element.
The content of the
<head>
elements on all the
<div>
elements in the document will be processed on the site into tables of contents, page
content lists, and direct links to sections of documents. (At processing time, which
is not the domain of the encoder but some knowledge thereof helps us understand why
our work is valuable, the
<div>
hierarchy determines the level of the heading—h1, h2, h3, and so on—when it is transformed
into HTML, LEMDO’s output format.)
For example, the
<head>
element just below the root
<div>
element renders as the title of the document (i.e. the highest level of heading),
and the
<head>
element below the second
<div>
element in the document renders as a level one heading (i.e. the second highest level
of heading). The text nodes of the
<head>
elements will also be rendered as a list of page contents (accessible via a navigation
pane) that users will use to navigate the page once it is rendered on the site.
Paragraphs
The basic structural unit within the
<div>
element is the paragraph, wrapped in the
<p>
element. Three paragraphs will often suffice instead of three divisions with headings,
especially if the paragraphs convey information that an editor or encoder is likely
to read as a unit. In other words, paragraphs are the obvious way of organizing information
when you do not want to split the information across multiple
<div>
elements.
Prose is the default mode of writing documentation, but do think carefully about how
people are most likely to need information presented. You are not writing an argument.
You are giving explanations and instructions. Instructions are often for step-by-step
procedures and often include forks in the road where an editor has to make a forced choice between options. Step-by-step procedures
lend themselves to numbered lists. Forced choices lend themselves to nested lists.
A paragraph may contain a list and/or nested lists. A paragraph may be used to introduce
or comment on a list.
Lists
Lists are an excellent way to organize information in documentation. They are highly
readable on screen and make it easy for readers scanning for a solution to find what
they need. If you find that you are creating comma-separated prose lists, consider
turning them into formal lists, wrapped in the
<list>
element with each item wrapped in the
<item>
element.
Conversely, do not encode as lists long blocks of text that are really paragraphs.
If you find that your list items are becoming long, then consider converting the list
back to paragraphs or even to small
<div>
elements with
<head>
elements to guide the reader to the right information.
Decide whether your list should be independent of a paragraph or embedded in a paragraph.
Consider the information in this table when deciding whether to embed a list in a
paragraph or keep it separate:
Lists Independent of Paragraphs
Lists Embedded in Paragraphs
Usually longer
Usually shorter
Extrinsic to the paragraph in terms of content
Intrinsic to the paragraph in terms of content
Probably not discussed in the next paragraph
Discussed in the remainder of the paragraph
Example: List independent of paragraph
<div> <!-- ... -->
<p>Running prose about something.</p> <list rend="bulleted"> <item>Item</item> <item>Item</item> </list> <p>Running prose about something.</p> <!-- ... --> </div>
Example: List embedded in paragraph
<div> <!-- ... -->
<p>Running prose introducing the list:</p> <list rend="bulleted"> <item>Item</item> <item>Item</item> </list> <p>Running prose commenting on the list.</p> <!-- ... --> </div>
For those readers who are thinking ahead to the XSLT processing that turns our XML
into HTML: HTML does not allow lists to appear inside paragraphs. However, we don’t
convert our lists and paras to HTML lists and paras; we use more generic block elements.
Types of Lists
LEMDO permits numbered, bulleted, and simple lists.
Use numbered as the value on the
@rend attribute if the items in the list are in a particular order (a step-by-step process
whereby one step must be completed before the next step) or if enumerating them is
important. In the latter case, there might be a preceding comment and an introductory
colon.
<div> <!-- ... -->
<p>Follow these three steps:</p> <list rend="numbered"> <item>Step One described, beginning with a second-person, imperative action verb.</item> <item>Step Two described.</item> <item>Step Three described.</item> </list> <!-- ... --> </div>
Use bulleted as the value on the
@rend attribute if the items are not sequential or ordered in any particular way:
<div> <!-- ... -->
<p>Tips for Encoding:</p> <list rend="bulleted"> <item>Learn Keyboard Shortcuts to save time</item> <item>Update (<code>svn up</code>) often</item> <item>Use the outline view in Oxygen to quickly see the structure of your file</item> </list> <!-- ... --> </div>
Simple lists have neither numbers nor bullets. We generally discourage the use of
simple lists because they have no distinguishing feature that marks them as a list
in the HTML output, other than indentation and a new line beginning. They are less
useful for the scanning reader than the two other types of lists. One use-case where
using the simple value on the
@rend attribute is the right choice is the linked table of chapter contents that we create
in the introductory file for each chapter.
Example from the table of contents for the documentation chapter:
<list rend="simple"> <item> <ref target="doc:learn_docStructure">Structure of Documentation</ref> </item> <item> <ref target="doc:learn_docPrinciples">General Documentation Principles</ref> </item> <item> <ref target="doc:learn_docStyle">Write Documentation: Style Guide</ref> </item> <item> <ref target="doc:learn_docCreate">Create and Name Documentation</ref> </item> </list>
Tables
Tables are an excellent way to display information. Use tables to convey information
that requires the user to look up something in order to learn how to encode or edit
that particular thing. For example, the list of abbreviations for various bibliographic
<idno>
elements lends itself to a two-column list with the name of the bibliographic resources
(e.g., Short Title Catalogue) in the first column and the abbreviation (STC) in the second.
Tables have the advantage of being sortable in alphabetical and reverse alphabetical
order on either column. The table foreseen in the preceding paragraph would give the
editor or encoder the ability to sort on the second column if they need to know the
details of the value on an
<idno>
, or to sort on the first column if they know the name of the resource and want to
discover its
<idno>
value.
Tables may have a
<head>
element. Use the first
<row>
element (with the
@role attribute and the label) to label the columns. Each subsequent
<row>
will have the data value and must have the same number of cells as the
<row>
with the label value.
Note that tables with more than four columns do not render well in our HTML output
and are therefore less usable to the editor/encoder.
To encode a table, use the following model:
<table> <head>Optional Head</head> <row role="label"> <cell>Head of first column</cell> <cell>Head of second column</cell> </row> <row role="data"> <cell>Data for first column of first row</cell> <cell>Data for second column of first row</cell> </row> <row role="data"> <cell>Data for first column of second row</cell> <cell>Data for second column of second row</cell> </row> </table>
Tips For Managing Complex Structures
Tips for Divisions
You must close the
<div>
elements in your documents in the same order that you opened them. Since the first
<div>
element is the largest container, its opening and closing tags must enclose all the
other
<div>
elements. Be careful when closing
<div>
elements because a misplaced closing
<div>
tag can, in rare cases, disrupt the content hierarchy without being invalid. Furthermore,
it is easy to lose sight of your opening
<div>
tag in a long, complex document. Errors are most likely to occur when you are moving
<div>
elements and their contents to new places in your document; you may well accidentally
disrupt your document hierarchy.
Strategies you can use to avoid misplaced closing tags:
If you added your content to the file (perhaps by copying and pasting content from
Teams, a .docx file, a .txt file, GoogleDrive, or any other non-XML context) and are
adding tags after the fact:
highlight the text that you want to contain under a particular heading and press Ctrl+e
(PC/Windows keyboards) or Cmd+e (Mac keyboards) to wrap it in a
<div>
element.
If you have done a document analysis and are adding tags first and copying in (or
writing) content after:
add all the
<div>
elements and nest them, add
<p>
elements as necessary, add your content to them, and encode it.
Use the Outline view in Oxygen (Window → Show View → Outline) and filter for
<div>
elements (by typing div in the filter box).
Tips for Encoding Lists
Wrap all of the text that you want to render as a list in a
<list>
element using ctrl+e, then wrap each list item in an
<item>
element. Nest lists by making a
<list>
element a child of an
<item>
element:
<list rend="bulleted"> <item>Check Tagging of Verse and Prose
<list rend="numbered"> <item>Remove Mode Milestones</item> </list> </item> </list>
Encode Intended Audience for Documentation
Rationale
Our documentation targets a number of different but intersecting user groups. To help
users filter the documentation and find the pages that are most relevant to them,
we have a created an taxonomy of audiences that corresponds to our Quickstarts:
@xml:id
Name
Description
audRemediator
Remediator
An encoder who has the responsibility of converting IML-encoded or TCP texts to the
LEMDO TEI P5 customization.
audEncoder
Encoder
Anyone who is encoding texts in the LEMDO TEI P5 customization.
audEditor
Editor
Anyone who is editing a play or related works for publication in a LEMDO anthology.
audAnthologyLead
Anthology Lead
Anyone who is responsible for a group of editors who are editing plays or related
works for publication in a LEMDO-generated anthology (e.g., the leads of MoMS, QME,
DRE, NISE).
audDeveloper
Developer
Anyone who is responsible for maintaining the repository, writing processing, running
builds, or customizing a CSS file for an anthology. Normally, developers are based
at UVic and work in the lemdo/code section of the repository. Anthology leads may
hire a developer/designer to customize a CSS file for an anthology.
audRepoUser
Repository User
Anyone who commits work to the LEMDO repository, including editors and RAs who have
write privileges on an edition portfolio.
audDocumenter
Documenter
Anyone who writes project documentation.
Principles
These principles work in tandem with the principles for organizing documentation in
general and structuring individual documentation files.
Write Documentation for an Audience
Think about the audience for whom a piece of documentation is intended. In general,
no single documentation page should be intended for more than two audiences.
Inheritance
The root div of a documentation will bear all the audience types for which the file
is intended (e.g., editors and encoders).
Child divs of the root (i.e., the second level of the XML tree of the document) may
bear one of the values listed on the root div.
Do not add audience types to third-level divs. If you find yourself nesting a div
that is pitched at a different audience, you probably want to place that div somewhere
else in the documentation where the intended audience will see it.
Self-identification
We know that remediators are necessarily encoders, and that editors are also encoders
if they are encoding their own work, and that anthology leads are often also editors
(and therefore often also encoders). Instead of trying to imagine all of the roles
that one person might inhabit, let the individual identify their own role at any given
point.
Our Quickstart documents are designed to address roles rather than individuals. They
point users to other Quickstart documents that are likely going to be relevant to
them as they move through various roles.
Encoding Practice
We use the
@ana attribute on the root
<div>
element. The value of
@ana is one of the values in the audiences taxonomy. The
@ana with a value pointing to an audience type is required on the root
<div>
.
Multiple values of
@ana are space-separated.
Optionally, we add the
@ana attribute to child
<div>
elements of the root
<div>
.
The
@ana attribute is not allowed on grandchildren
<div>
elements of the root.
Examples
In the following example, the intended audiences for the document are Encoders and
Editors. The
@ana goes on the root
<div>
element. (Note that our example omits the
@xmlns attribute that we normally have on the root
<div>
in documentation files.)
<div xml:id="learn_HAND1" resp="or:odd_JENS1_wtm or:odd_VATC1_wtm" ana="audEncoder audEditor draft"> <head>Title of Page</head> <p><!-- Other divs, paragraphs, and examples follow. --></p> </div>
Encode Sample XML
Our documentation often includes sample XML that is not meant to be processed as part
of the XML encoding of the file, but rather to be rendered on the site with all of
its angle brackets visible to the reader who is trying to learn XML. We need a way
to talk about XML in the context of a document encoded in XML. Fortunately for us,
the XML specification has already forseen this need with
<egXML>
and other elements, which TEI has adopted.
This section enumerates the elements we use to encode sample XML and explains when
and how to use them. Read more about documentation elements in the TEI Guidelines.
LEMDO uses eight elements to wrap sample code and tags in running text:
Element
Purpose
<egXML>
Setting off complete (valid="true") or incomplete (valid="false") samples of TEI-XML
<gi>
Wrapping element names
<att>
Wrapping attribute names
<val>
Wrapping values
<eg>
with CDATA
Wrapping IML
<code>
For executable commands, including Terminal commands and SVN commands
<ident>
For file names, file paths, labels, and variables
<tag>
Wrapping an opening (type="start") or closing (type="end") tag in running text
These will render inline by default. If any of these needs to be a block in the output,
wrap in an
<ab>
element.
We often include strings of XML in documentation as examples to illustrate processes
or concepts. Use the
<egXML>
element to tag sample XML code. Do not use
<egXML>
to tag non-XML code; use the
<eg>
element instead.
Use the
<egXML>
element only to wrap sample XML outside of the context of a paragraph (running text).
Do not wrap XML that appears in running text in the
<egXML>
element; use the
<gi>
,
<att>
, and
<val>
elements instead to tag the elements, attributes, and values mentioned in running
text. The
<egXML>
element is strictly used for examples that are separate from running text.
Namespace for egXMLs
The
<egXML>
element has its own namespace. Give the
<egXML>
element the
@xmlns attribute and the value http://www.tei-c.org/ns/Examples. Typing
<egXML>
in Oxygen will generate a drop-down menu from which you can select the element with
the
@xmlns attribute and this value already added. This namespace ensures that the content of
the example is validated by a special process (if the sample has the
@valid value of true; see Validity of Sample XML).
Validity of Sample XML
All
<egXML>
elements must have the
@valid attribute. Allowed values are true and false. Unlike the tei-all.rng schema, the LEMDO schema does not allow the feasible value. Examples are true if they are complete and valid. Examples are false if they are deliberately incomplete. Avoid creating counter-examples or negative examples.
Occasionally, our sample XML is left incomplete so that we can demonstrate an aspect
of encoding procedure without cluttering up the example with other intersecting procedures.
See the principle of Economy of Example. Such sample XML must be given the
@valid value of false to avoid misleading the user.
Use the value true only if you are absolutely sure that the sample XML is complete and valid according
to the schema rules for the type of document in which it is meant to be used. See
Validity of Example.
The LEMDO build process will validate code wrapped in the
<egXML>
element if the
@valid attribute has the value true. This system will extract sample XML into a separate file and validate it against
our schema, breaking if an example that has the value of true is invalid. In order for the system to work, all deliberately incomplete code must
be tagged as false so the system does not attempt to validate it. These values will also allow us to
render incomplete code differently from complete, valid code on the LEMDO site. In
order to be valid, an example must have a single root element which is a direct child
of the
<egXML>
element.
All
<egXML>
s with the true value are validated during the build process. If they are not valid, they will break
the build. They cannot be validated using our normal schema because they are in a
different namespace.
If you want to check all your
<egXML>
s before you commit a file, run the following command in your Terminal: ant validateEgXMLs. You will have to have ant commands installed if you are working on your own computer.
Ant commands will work on all the HCMC workstations.
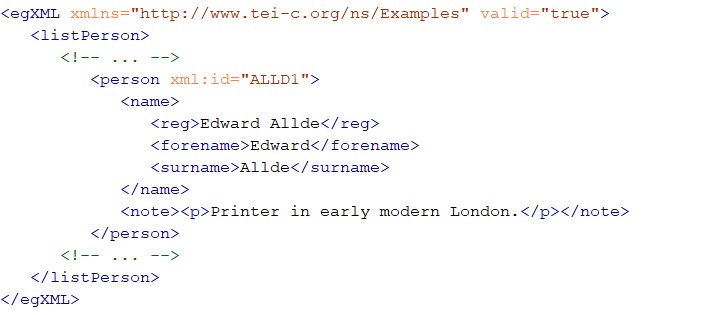
Omission of Material from Sample XML
In many cases, we want to indicate that the parent element in the sample XML would
normally have additional child elements. For example, if
<list>
is the parent, one would normally have multiple child
<item>
elements. If
<listPerson>
is the parent element, one would normally have multiple child
<person>
elements. In these cases, we normally give just one sample child element but include
a commented-out ellipsis before and after this child element:
Showing Examples of
<egXML>
Elements
The
<egXML>
element itself cannot be wrapped in another
<egXML>
element. In this present documentation file, where we need to give examples of
<egXML>
, we have had to do a screen capture from Oxygen and insert a .jpg in the file. (Yes,
writing documentation about writing documentation gets very meta. The TEI Guidelines have the same problem, so we are not alone.) For guidelines on storing and linking
images, see Add Images to the Repository.
Counter-Examples and Negative Examples
Do not wrap deliberately wrong examples in
<egXML>
. Use the
<eg>
element in those rare cases where you want to give an example of something that needs
to be remediated after the conversion. Thus far (in 2021), we give negative examples
mainly in the Appendix on Remediation.
Rendering Considerations
Anything tagged with
<egXML>
is rendered as an indented block with the default colours that Oxygen uses for elements
(blue), attributes (orange), values (brown), and text nodes (black). We have added
a background colour (currently light grey) to make the sample XML highly distinct.
This rendering means that you will not want to use
<egXML>
for short examples in running prose. It also means that you may want to include enough
running prose from your sample to make the sample encoding make sense.
For example, if you wanted to demonstrate how to use the
<quote>
element in a note, give enough of the note text for the example to make sense (the
actual note by David Bevington is longer):
Note that white space and carriage returns within the text nodes of elements affect
the rendering of the contents of
<egXML>
elements, unlike most other elements. Delete extra white space or carriage returns
in the text nodes of
<egXML>
elements so the examples render correctly.
Examples of Sample XML
These examples of
<egXML>
offer complete, valid XML:
Encode Element Names
Practice
LEMDO uses the
<gi>
element to wrap the name of any sample TEI or XML element in running prose. Do not
use the
<gi>
element to encode a closing tag in running prose, use the
<tag>
element. Do not use
<gi>
to tag non-XML elements, use the
<eg>
element. For more information, see Encode Closing Tags and Encode Non-XML Markup.
Rendering Note
When the name of an element is wrapped in the
<gi>
element, the processor renders the element name with angle brackets. The schema does
not flag it as an orphaned opening tag. When LEMDO’s documentation is generated, elements
wrapped in the
<gi>
element also turn into links to that element specification in our Elements Index.
LEMDO uses the
<eg>
element to tag non-XML elements in running text (e.g., SGML and IML, the ISE Markup
Language). Do not use the
<gi>
element to tag non-XML elements.
Note that the rendering process will not add angle brackets around the text node of
the
<eg>
element the way it wraps angle brackets around the text node of a
<gi>
element. Note also that you cannot type angle brackets anywhere in the text node
of an element—including the
<eg>
element—unless it is wrapped in
<egXML>
, which you would not do unless you were trying to give an example of how to wrap
the XML element
<eg>
around SGML. If it is absolutely necessary to display the angle brackets, then you
must escape them using the standard escape sequence (see Encode Escaped Characters).
Note that IML tags are not valid in any LEMDO TEI-XML document. The processor does
not check the contents of the
<eg>
element if it is wrapped in an
<egXML>
element, which is how we encoded the first example below.
Examples
Example of non-XML element name in running text tagged with the
<eg>
element:
Note that the above example of IML would be extensively remediated upon conversion
into TEI. The TLN number would be replaced with anchors and pointers. We give it here
only as an example of IML in its pre-converted and pre-remediated state.
Encode Command Line Instructions
LEMDO wraps the
<code>
element around SVN commands and other command-line instructions. They are rendered
with a typewriter typeface that resembles code. This formatting makes it clear to
readers what text they need to input into their command line (Terminal).
LEMDO uses the
<tag>
element in the rare case that we need to discuss a closing tag in running text. Note
that the
<tag>
element should automatically supply opening and closing brackets, and a slash for an end tag, based
on the value of the
@type attribute, but it currently does not. There is a feature request on the TEI Stylesheets repository to address this. So at the moment, you will have
to insert slashes etc. manually.
Examples
Your encoding:
<p>The closing tag is <tag type="end">/title</tag>. An empty tag is <tag type="empty">lb/</tag>. A tag with attributes is <tag type="start">title level="m"</tag>.</p>
LEMDO rendering: The closing tag is </title>. An empty tag is <lb/>. A tag with attributes is <title level="m">.
Other Encoding Instructions
This section offers additional instructions for encoding documentation.
Format Examples
Sometimes we want to discuss in our documentation how our code renders on the LEMDO
site. Formatting examples like this shows users both how to use elements and how they
affect the rendering of text on the site. Format examples to show both the markup
that users need to add and how that markup affects the text if you want to show how
our code renders on the site:
There are some symbols that you must sometimes escape in XML. Because these symbols are part of the code, you must differentiate them from
code when you are using them for another purpose. Read about escaped characters in
The World Wide Web Consortium.
Description
Original Character
Escaped Character
Quotation mark
"
"
Apostrophe
’
'
Opening angle bracket (less-than sign)
<
<
Closing angle bracket (greater-than sign)
>
>
Ampersand
&
&
Example showing how to encode escaped angle brackets if you want to talk about them
as characters in running text:
<p>This character is an opening angle bracket: <eg><</eg>. This character is a closing angle bracket: <eg>></eg>.</p>
LEMDO rendering:
This character is an opening angle bracket: <. This character is a closing angle bracket:
>.
Another use case is the collations. The Folger Shakespeare texts use angle brackets (pointed parentheses) for certain readings. We will need to show editors how to escape the pointed parentheses
in their collations, for which we will need to use CDATA.
You can also use CDATA to treat angle brackets as text instead of element delimiters.
See also the Wikipedia entry for CDATA, or look at the underlying XML encoding for the file you are looking at right now,
in which we use CDATA a number of times. Documenting how to use CDATA is too meta
even for our meta-documentation.
Make Links to and from Documentation
LEMDO prefers a series of densely interlinked files and sections over a single linear
XML file (See Documentation Style Guidelines). This section explains the best practices for linking to sections within an XML
file from other parts of the same file or from other XML files, for linking to XML
files from other XML files, and for linking from our XML files to external sources.
Link to Specific Sections in Files Within LEMDO’s Repository
To link to a specific section in a file in LEMDO’s repository, you must:
Insert a
<ptr>
element where you would like the link to be.
Give the
<ptr>
element a
@target attribute.
Begin the value with the doc: prefix, followed by the name of the file you want to link to (excluding the file
extension).
Add a hash character (#) after the file name in the value, followed by the xml:id of the
<div>
element you want to link to.
Sample encoding of a link from another file to a specific
<div>
element in learn_encodeForeignLanguages.xml:
<p>For more information, see <ptr target="doc:learn_encodeForeignLanguages#learn_encodeForeignLanguages_quotations"/>.</p>
Note that the process is the same for linking from one section to another section
within the same file. Add the name of the file you are working on after the doc: prefix and add the xml:id of the section you want to link to after the hash character.
Link to Another File In LEMDO’s Repository
To link to another XML file in LEMDO’s repository, you must:
Insert a
<ptr>
element where you would like the link to be.
Give the
<ptr>
element a
@target attribute.
Begin the value with the doc: prefix, followed by the name of the file you want to link to (excluding the file
extension).
Sample encoding of a link from one file to learn_encodeQuotations.xml:
<p>For more information, see <ptr target="doc:learn_encodeQuotations"/>.</p>
To link to an external web page (such as the TEI Guidelines), you must:
Choose the word or phrase to bear the link
Wrap that word or phrase in a
<ref>
element
Add a
@target attribute to the
<ref>
element
Paste the full URL of the web page into the value (including the http:// or https://).
Sample encoding of a link from a LEMDO file to an element spec in the TEI Guidelines:
<p>See the <ref target="https://www.tei-c.org/release/doc/tei-p5-doc/en/html/ref-stage.html">element specification for the <gi>stage</gi> element in the <title level="m">TEI Guidelines</title> </ref>.</p>
For well designed web pages, such as the TEI Guidelines, it is often possible to link to specific sections of the page. If you can click
on a pilcrow symbol or an anchor, check the URL to see if it changes from the page
URL to something more specific. If yes, you can use this URL to link directly to the
section in question.
<p>See <ref target="https://www.tei-c.org/release/doc/tei-p5-doc/en/html/DR.html#DRSTA"> <title level="a">7.2.4 Stage Directions</title> </ref> in the <title level="m">TEI Guidelines</title>.</p>
Link to Sources Outside of LEMDO that Have Pre-Defined LEMDO Pointers
A few websites to which we often link have been given prefixes in the LEMDO system
(e.g., MoEML, STC, EEBO, WSB, DEEP). These prefixes are all defined in TAXO1.xml.
Look for the
<listPrefixDef>
element in TAXO1.xml, where the complete list is give along with the URLs to which
the prefixes will point.
In documentation, we often point to the MoEML Praxis pages. Because we have a prefix
for MoEML (mol:), typing mol:praxis is a shorthand way of indicating https://mapoflondon.uvic.ca/praxis.htm.
<p>You’ll find <ref target="mol:subversion">full SVN instructions on the MoEML site</ref>.</p>
Rather than define technical terms repeatedly throughout the documentation, we link
to a central database file called GLOSS1.xml. This database contains technical terms and project-specific terms and definitions
thereof. Exclusions: it does not contain definitions of bibliographical or editorial
terms. Those terms will be defined in a separate glossary or in EMEE.
Our practice is to make a link the first time a term appears in a single documentation file (i.e.,
an XML file in lemdo/data/documentation). The principle here is to ensure that definitions are available in the smallest chunk of documentation
that a user might access. This practice means that anyone reading through an entire
chapter (which stitches the XML files therein into one HTML page if one accesses chapters
from the documentation index) may encounter multiple links to a definition of a single
term over the course of the chapter. It is better to have the definition available
multiple times in one chapter than not available in any single piece of the chapter.
Documentation writers may add additional links at their discretion. For example, you
may wish to add a link to the definition of a term in a long piece of documentation
when the term has not been used for a while.
GLOSS1 Database Structure
The GLOSS1.xml database is organized alphabetically. Each item is structured as follows:
<item xml:id="OXYG1"> <label>Oxygen</label> <gloss>The XML document editor that we use to encode and edit LEMDO’s XML files.</gloss> </item>
Each item has an ID and a label, then a gloss definition. You can add to this whenever
you need to gloss a term in the documentation.
Link to Glossary Item
To link to the glossary, do this:
<term ref="gloss:OXYG1">Oxygen</term>
and the term will be converted into a link which creates a popup in the normal way.
Schematron
Do not tag terms in headings. We have a Schematron rule prohibiting the use of
<term>
inside
<head>
.
Do not tag terms within links to other documents. Doing so will break the build because
we cannot have two hyperlinks on a single string. We have a Schematron rule prohibiting
the use of
<term>
inside
<ref>
.
Include Automatically-Generated Content in Documentation
LEMDO documentation constitutes human-readable elucidation of specifications, structures,
and processes which are encoded in various programming languages behind the scenes.
For example, documentation may explain how and when to use a
<p>
element, but the
<p>
element itself is specified in the LEMDO ODD file and in the schemas generated from
it.
In the LEMDO taxonomies file (TAXO1) there are multiple TEI
<taxonomy>
elements in which we specify the various document types, work types, editorial treatments,
and so on. When explaining how to use the various categories in these taxonomies,
it is helpful to be able to provide a human-readable representation of the taxonomies
in the documentation page. You can do this very simply by including a single processing instruction (PI) like this: <?taxonomy-table ref="emdAudiences"?>
This tells the processor to find the
<taxonomy>
element in TAXO1 which whose
@xml:id=emdAudiences, and process it to create a TEI
<table>
element laying out all the categories and their definitions. That table is later
processed into an HTML table in the documentation page for the site.
Note that you should only include this PI in a context in which a TEI
<table>
element would be allowed by the schema. If you put it somewhere else, the source
document you are encoding will still be valid, but when the PI is expanded into a
table at processing time, that XML will be invalid and the build will fail. Check
whether a
<table>
element is allowed in the context before adding the PI.
Two other similar processing instructions exist. One is for including tables built
from character declarations (
<charDecl>
): <?charDecl-table ref="characters"?>
The other is for prefix definition lists (
<listPrefixDef>
): <?listPrefixDef-table ref="global_listPrefixDef"?>
Create Templates for Editors
One of the most useful forms of documentation is the XML template. These are files
containing the basic encoding structure for the target document along with extensive
XML comments offering instructions, advice, and links to documentation,
<div>
s, pages, and chapters. Editors and RAs can open a template from the Oxygen File menu
and follow the instructions therein.
Make a Template
Templates are saved in lemdo/data/templates. The easiest way to make a template is to take a complete, valid file of the type
for which you want to make a template. Give the file a meaningful name ending in _template.xml (e.g., annotations_template.xml). Remove most of the content of the original file, retaining only what is required
to make the file validate and/or serves as a useful example. Generally, it is best
to use published files as the basis for the template because the material has already
been peer-reviewed and published as an open-access resource. If you want to take examples
from an unpublished file, you must ask the editor(s) and the anthology lead(s) for
permission.
If you are making a template for a document type for which we do not yet have any
examples, you will probably need to create a valid sample file first. Test it rigorously
and consult with the project developers to ensure that we have processing in place
for your encoding.
Provide Guidance to Editors/RAs
Furnish the template with guidance and instructions in the form of XML comments. Here
are some tips:
Be generous and clear.
Give examples as often as possible.
Give the URIs of relevant documentation divisions, pages, or chapters.
Indicate clearly when the user of the template needs to change the information in
the text node of an element, or the value of an attribute. For example, the template
file has an xml:id matching the file name. The user of the template will need to change
that xml:id to match the name of the new file that is being created with the use of
this template.
Get a team member to test your template. Use their feedback to improve the guidance.
Proofread the template carefully. Any errors we make in the template will proliferate
through the site as users create files from the template.
Notes
For the template file to be valid, we need to give xml:ids (e.g., to div elements
in templates, on the root element, etc). However, we cannot use an xml:id that already
appears elsewhere in the site. Reuse of an extant xml:id (even just to offer an example)
will break the build.
Until a developer offers a different solution, we suggest creating ids with ABBR in
lieu of the play id: e.g., emdABBR_M_annotation.
Prosopography
Illya
Illya has a BA in English and Sociocultural Anthropology and an MA in English. Prior
to joining the HCMC, he was a PhD candidate in English and Book History at the University
of Toronto and worked on Records of Early English Drama and on the Modernist Archives Publishing Project. His work at the HCMC focuses on creating web-based applications for research projects
led by members of the faculty of Humanities at the University of Victoria. This involves
creating schemas for new and existing datasets, writing XSLT and build files to transform
datasets into structured TEI and HTML formats, implementing staticSearch, and ensuring
that new projects are Endings Principles compliant.
Isabella Seales
Isabella Seales is a fourth year undergraduate completing her Bachelor of Arts in
English at the University of Victoria. She has a special interest in Renaissance and
Metaphysical Literature. She is assisting Dr. Jenstad with the MoEML Mayoral Shows
anthology as part of the Undergraduate Student Research Award program.
Janelle Jenstad
Janelle Jenstad is a Professor of English at the University of Victoria, Director
of The Map of Early Modern London, and Director of Linked Early Modern Drama Online. With Jennifer Roberts-Smith and Mark Beatrice Kaethler, she co-edited Shakespeare’s Language in Digital Media: Old Words, New Tools (Routledge). She has edited John Stow’s A Survey of London (1598 text) for MoEML and is currently editing The Merchant of Venice (with Stephen Wittek) and Heywood’s 2 If You Know Not Me You Know Nobody for DRE. Her articles have appeared in Digital Humanities Quarterly, Elizabethan Theatre, Early Modern Literary Studies, Shakespeare Bulletin, Renaissance and Reformation, and The Journal of Medieval and Early Modern Studies. She contributed chapters to Approaches to Teaching Othello (MLA); Teaching Early Modern Literature from the Archives (MLA); Institutional Culture in Early Modern England (Brill); Shakespeare, Language, and the Stage (Arden); Performing Maternity in Early Modern England (Ashgate); New Directions in the Geohumanities (Routledge); Early Modern Studies and the Digital Turn (Iter); Placing Names: Enriching and Integrating Gazetteers (Indiana); Making Things and Drawing Boundaries (Minnesota); Rethinking Shakespeare Source Study: Audiences, Authors, and Digital Technologies (Routledge); and Civic Performance: Pageantry and Entertainments in Early Modern London (Routledge). For more details, see janellejenstad.com.
Joey Takeda
Joey Takeda is LEMDO’s Consulting Programmer and Designer, a role he assumed in 2020
after three years as the Lead Developer on LEMDO.
Mahayla Galliford
Project Manager, 2025-present; Assistant Project Manager, 2024-2025; Research Assistant,
2021-present. Mahayla Galliford (she/her) graduated from the University of Victoria
with a BA (honours with distinction) in 2024, and an MA English in 2026. Mahayla’s
undergraduate research explored early modern stage directions and civic water pageantry.
Her SSHRC-funded MA thesis project focuses on transcribing, editing, and encoding
early modern girls’ manuscripts, specifically Lady Rachel Fane’s May Masque in collaboration with LEMDO.
Martin Holmes
Martin Holmes has worked as a developer in the UVic’s Humanities Computing and Media
Centre for over two decades, and has been involved with dozens of Digital Humanities
projects. He has served on the TEI Technical Council and as Managing Editor of the
Journal of the TEI. He took over from Joey Takeda as lead developer on LEMDO in 2020.
He is a collaborator on the SSHRC Partnership Grant led by Janelle Jenstad.
Navarra Houldin
Training and Documentation Lead 2025–present. LEMDO project manager 2022–2025. Textual
remediator 2021–present. Navarra Houldin (they/them) completed their BA with a major
in history and minor in Spanish at the University of Victoria in 2022. Their primary
research was on gender and sexuality in early modern Europe and Latin America. They
are continuing their education through an MA program in Gender and Social Justice
Studies at the University of Alberta where they will specialize in Digital Humanities.
Nicole Vatcher
Technical Documentation Writer, 2020–2022. Nicole Vatcher completed her BA (Hons.)
in English at the University of Victoria in 2021. Her primary research focus was women’s
writing in the modernist period.
Samuel Seaberg
Samuel Seaberg, a University of Victoria English undergrad, enjoys riding his bike.
During the summer of 2025, he began working with LEMDO as a recipient of the Valerie
Kuehne Undergraduate Research Award (VKURA). Unfortunately, due to his summer being
spent primarily in working to establish an edition of Thomas Heywood’s If You Know Not Me, You Know Nobody, Part 2 and consequently working out how to represent multi-text works in a digital space,
his bike has suffered severely of sheltered seclusion from the sun. Note: Samuel now
works for LEMDO as the Assistant Project Manager, much to his bike’s chagrin.
Tracey El Hajj
Junior Programmer 2019–2020. Research Associate 2020–2021. Tracey received her PhD
from the Department of English at the University of Victoria in the field of Science
and Technology Studies. Her research focuses on the algorhythmics of networked communications. She was a 2019–2020 President’s Fellow in Research-Enriched
Teaching at UVic, where she taught an advanced course on Artificial Intelligence and Everyday Life. Tracey was also a member of the Map of Early Modern London team, between 2018 and 2021. Between 2020 and 2021, she was a fellow in residence
at the Praxis Studio for Comparative Media Studies, where she investigated the relationships
between artificial intelligence, creativity, health, and justice. As of July 2021,
Tracey has moved into the alt-ac world for a term position, while also teaching in
the English Department at the University of Victoria.
Bibliography
TEI Consortium, The. TEI P5: Guidelines for Electronic Text Encoding and Interchange. Ed. C.M. Sperberg-McQueen and Lou Burnard. Revised and expanded under the supervision of the Technical Council of the TEI Consortium.
Text Encoding Initiative Consortium, 2020. https://tei-c.org/release/doc/tei-p5-doc/en/html/index.html.